Ready, set, grow! The lengthening days are Mother Nature’s starting pistol as the warmer temperatures and increased light act like rocket fuel to your indoor plants. So take advantage of this slow spring by turning your attention and energy back inside to your houseplants.
Whether you’re up-potting your pot-bound plant into a larger container, or just re-potting into fresh soil, your plants will reward you with new leaves and shoots. And to ensure that lush growth, there are a couple of things to take into consideration and a few rules to follow.
The longer a plant stays in the same pot, the more likely that salts and mineral residues in municipal water will build to harmful levels in the potting mix. And the mix itself, mostly organic elements, disintegrates over time. Re-potting replaces the tired mix with some fresh mix.
And how do you know when your plants need some attention? The most obvious sign is roots growing on the surface of the soil or emerging from the drainage hole in the bottom of the container. If the plant seems to stop growing or has slowed growth, it may be pot-bound. Turn the pot on its side and ease the plant out of its container. Take a peek at the roots. Are they coiled in the bottom of the pot? If so, it’s definitely time to up-pot. Plants that have grown offsets can become crowded, and need separating.
Young, actively growing house plants should to be moved into slightly larger pots with fresh potting mix about once a year. Repotting large, slow-growing house plants can be done every two years or so, when they seem to outgrow their pots or look top-heavy. If a plant is thriving, you should assume it is happy in its pot. Plants newly purchased from the Garden Center are unlikely to need re-potting.
It’s a good idea to re-pot a plant at the beginning of a period of active growth, usually in spring. The new pot should be no more than 2 inches wider at the rim than the old one. Any larger container will hold too much water and can cause root rot. And be sure to choose a pot that has drainage holes to allow excess water to escape. Scrub out used pots between plantings to prevent the spread of any soil-borne diseases. You can disinfect your pots by soaking them in a solution of one part chlorine bleach to nine parts water. Rinse well with clear water.
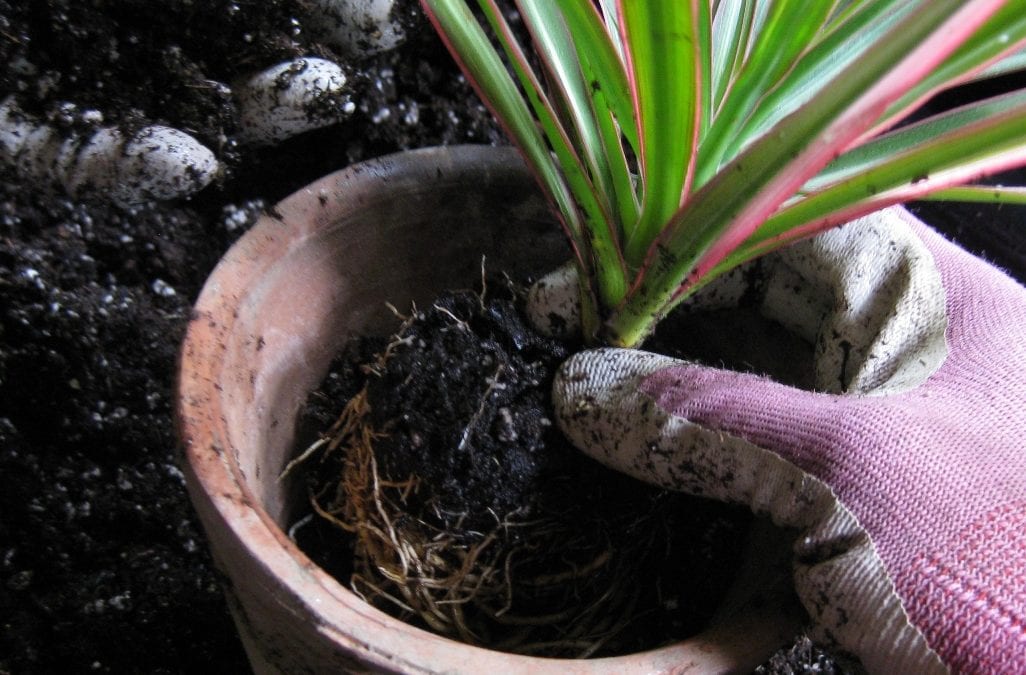
Once you’ve got your pots ready, it’s time to prep your plants. Turn the plant and pot upside down, and supporting the soil with your open hand, tap the bottom of the pot with your other hand. Then gently ease the plant out of its container. Determine whether the plant is root bound. If not, simply repot the plant in a pot of the same size, filled with fresh potting soil. If the plant is root-bound, transplant it to a pot about 1 inch larger in diameter than the original. Bound roots will require loosening by pulling them downward and away from the soil with a kitchen fork. Don’t worry if some of the roots break off.
Next, fill your clean pot about halfway with some fresh soil-less potting mix and add a little water to moisten. Nestle the plant into the fresh soil, centering the top of the root mass 1/2 inch below the rim of the pot. Put new soil around the top of the plant, keeping soil at same level. Water thoroughly. Use your fingers to work the soil around the edges of the root-ball so there are no air holes. To finish the job, tap the pot on a hard surface to pack the soil to remove air pockets around the roots and the wall of the pot.
Finally, place newly potted plants in bright, but in-direct light for a week. This gives them a chance to adjust to their new home. Also refrain from fertilizing for a few weeks. Once your plant’s root system is re-established, you should notice new top growth.